

In this blog, we are going to create a basic to-do list app using the BLoC Pattern and SQLite database. So let's get started but before going to start and creating the app with all the functionalities we first need to understand what the BloC Pattern is and how does it work.
So The BLoC pattern stands for Business Logic Component Pattern. It is a pattern created by Google and announced at Google I/O ’18. The BLoC pattern uses Reactive Programming to handle the flow of data within an app.
A BLoC is like a middleman between a source of data in your app (i.e. the Sqlite database) and widgets that need the data. It receives streams of data also called events from the source, handles any required business logic, for the streams, and then publishes streams of data changes to widgets that are interested in them.
A BLoC has two simple components: Sinks and Streams, both of these are provided by a StreamController. You add streams of data input into a Sink and listen to them as Streams of data output through a Stream.
Now since we have understood what is BLoC Pattern is and how does it work so now we can start creating our app and name the app as todo_list.
NOTE:- For creating a new flutter project you can refer here Flutter App.
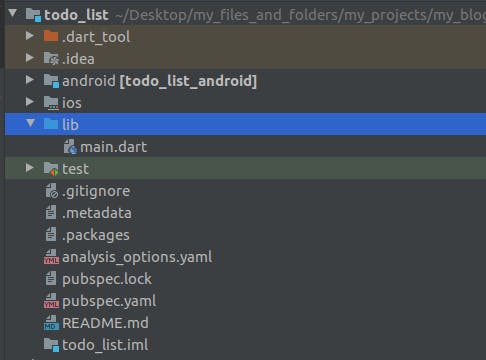
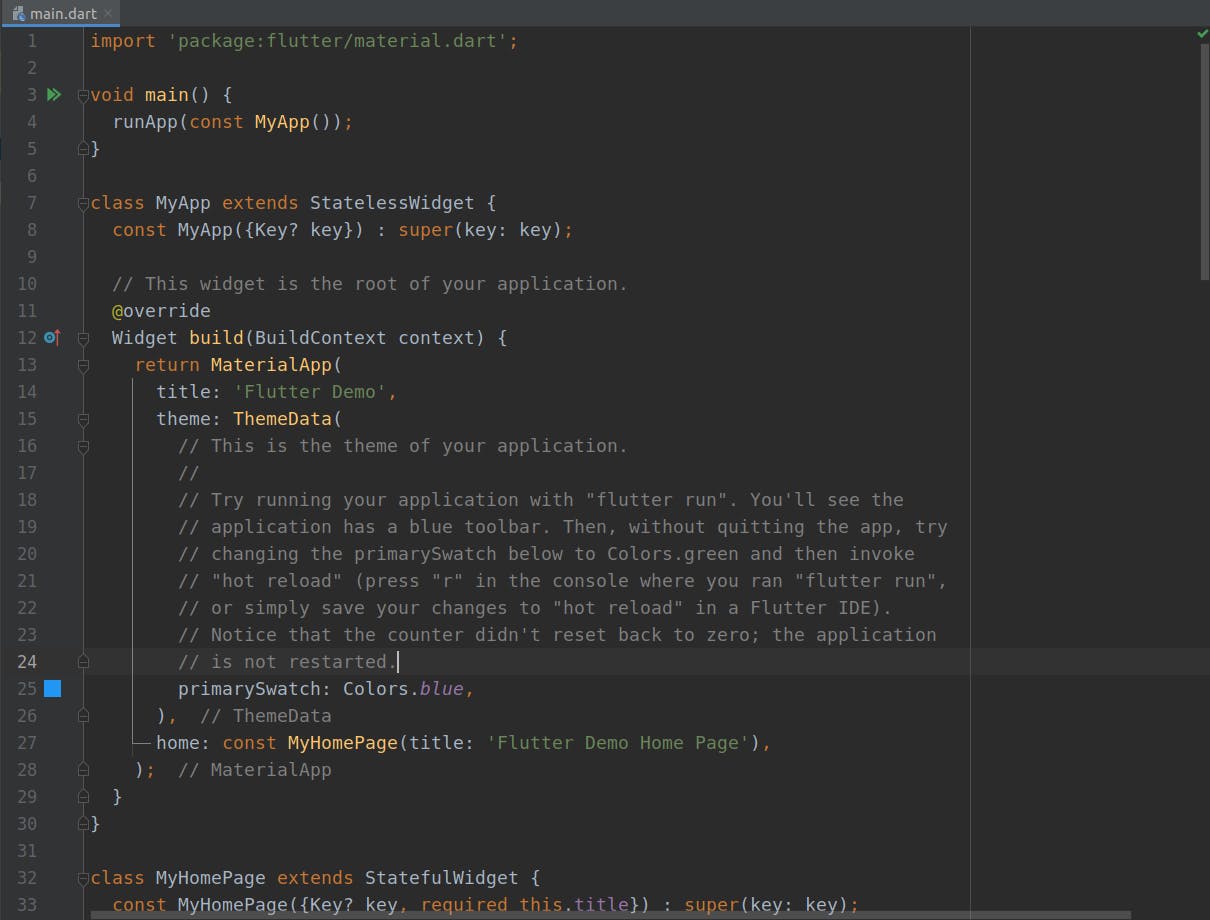
Our app is currently having the following structure and the boilerplate code is the main.dart file.
Now first of all let us remove all the boilerplate code from the main.dart file and create the project structure for our app by adding the blocs, resources, model,ui, and the database folder to our lib directory. as shown below.
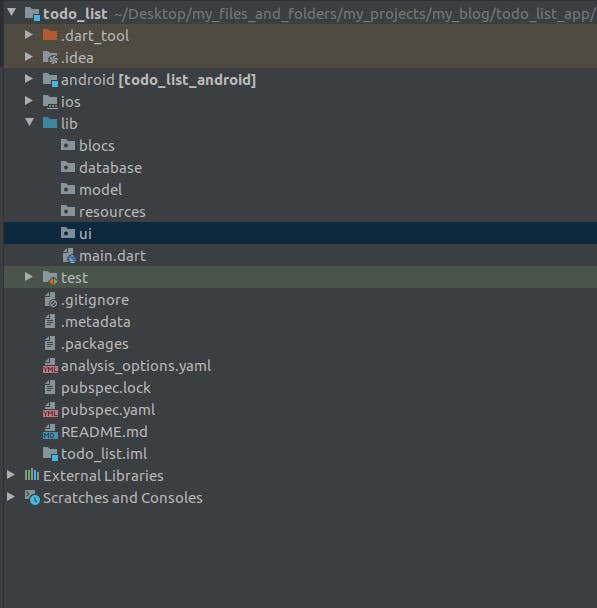
So inside the lib directory, the model directory is used to create the model for our todo list that contains all the properties like the title of the todo list and whether the task is done or not, the database directory will contain all the code for interacting with the SQLite database, the bloc directory will contain all the business logic for the functionality of our application and the ui directory will contain the UI of the app that will be shown to the user who will be viewing the app.
Firstly we need the rxdart,sqflite, path, and the path_provider package for our project since the rxdart will be used for structuring our app using BLoC Pattern, and the sqflite will be used for storing and retrieving our data from the SQLite database so after adding these packages our pubspec.yaml file will be as follows.
name: todo_list
description: A new Flutter application.

publish_to: 'none' # Remove this line if you wish to publish to pub.dev

version: 1.0.0+1

environment:
  sdk: ">=2.12.0 <3.0.0"

dependencies:
  flutter:
    sdk: flutter

  cupertino_icons: ^1.0.2
  rxdart: ^0.27.3
  sqflite: ^2.0.1
  path_provider: ^2.0.8
  path: ^1.8.0

dev_dependencies:
  flutter_test:
    sdk: flutter

  flutter_lints: ^1.0.0


flutter:

  uses-material-design: true
Now Let's start by creating the model for our project that will contain the properties for our to-do list. So inside the model directory create a dart file named todo_model.dart and inside this file create a TODOModel class having the id, title, and the done properties for our todo list.
class TODOModel{
  // the property below is used to get the id of the task
  int? id;
  // property below is used for getting the title
  String? title;
  // property below is used to check that whether the task is done or not
  bool? done;

  // the code below is used to create a constructor for initialization
  TODOModel({
    this.id,
    this.title,
    this.done = false,
  });

  // the code below is used to create a factory method for converting the json Data
  // to dart object
  factory TODOModel.fromJSON(Map<String,dynamic> json) {
    return TODOModel(
      id: json['id'],
      title: json['title'],
      done: json['is_done'] == 0 ? false : true,   // since the sqlite does not have the boolean type
      // so we are using 0 to denote false and 1 to denote true
    );
  }

  // the code below is used to create a method for converting dart object to json to
  // be stored in the database
  Map<String,dynamic> toJSON(){
    return {
      'id': id,
      'title': title,
      'is_done': done == false ? 0 : 1, // since the sqlite does not have the boolean type
      // so we are using 0 to denote false and 1 to denote true
    };
  }

}
In the above code snippet, we have also added the Dart constructor for initializing the properties along with the other two methods namely fromJSON() and toJSON(). The fromJSON() method is used to convert the sqflite result which is in JSON format to The TODOModel dart object and the toJSON() method is used to convert our TODOModel dart object to the JSON format that is understood by the sqflite.
Now let us start creating our database by creating a file named database.dart inside the database directory as shown below.
// the code below is used to create a class database for creating the sqlite database
// for our project
import 'dart:io';
import 'package:path/path.dart';
import 'package:path_provider/path_provider.dart';
import 'package:sqflite/sqflite.dart';

class DatabaseProvider {
  // the code below is used to create a static final instance of the Database provider class
  static final DatabaseProvider dbProvider = DatabaseProvider();

  // the code below is used to create an instance of the database from our sqflite package
  Database? database;

  // the code below is used to create a getter for checking that if the database
  // is not null then returning the database else creating a new database
  Future<Database> get db async {
    if (database != null) {
      return database!;
    } else {
      database = await createDatabase();
      return database!;
    }
  }

  // the code below is used to create a method to create the database
  Future<Database> createDatabase() async {
    // the code below is used to get the location of the application document directory
    Directory docDirectory = await getApplicationDocumentsDirectory();
    // the code below is useed to get the path where our sqlite database will be located
    // by using the join method
    String path =
        join(docDirectory.path, "todo.db"); // here todo.db is the name of
    // our database

    // in the line of code below we need to use the openDatabase() method to
    // open the database and create the table using raw sql command
    var database = await openDatabase(
      path, // the path where our database is located
      version: 1,
      onCreate: (Database db, int version) async {
        await db.execute("CREATE TABLE todoTable ("
            "id INTEGER PRIMARY KEY AUTOINCREMENT, "
            "title TEXT, "
            "is_done INTEGER "
            ")");
      },
      onUpgrade: (Database db, int oldVersion, int newVersion) {
        if (newVersion > oldVersion) {}
      },
    );

    return database;
  }
}
So in the above code, the getter db is used to get the database but first, it checks that if the database is not null then it returns the database else if the database is null that means the database does not exist then it creates the database by using the createDatabase method that we have defined.
Now we need to create a class that will act as the controller and this class will contain all the methods that we will be using to perform the operations on the database like adding the todo task to the database or getting the list of todo tasks from the database or removing a task from the database. So now let's create a database_controler.dart file inside the database directory and inside this file we will create a DatabaseController class that will contain all the methods that we will use to perform the operations on the database.
// the code below is used to create a class to act as a controller for performing
// the operations on our database
import 'package:todo_list/database/database.dart';
import 'package:todo_list/model/todo_model.dart';

class DatabaseController{
  // the code below is used to create a property for accessing the database provider
  final dbClient = DatabaseProvider.dbProvider;

  // the code below is used to create a method to add a new task to our todo database
  Future<int> createTODO(TODOModel todo) async {
    // the code below is used to get the access to the db getter
    final db = await dbClient.db;
    // the code below is used to insert the data to the todo table using the insert
    // method and passing the instance of the TODOModel as input
    var result = db.insert("todoTable", todo.toJSON()); // here todoTable is the name of
    // the table in the database
    return result;
  }

  // the code below is used to create a method for getting the list of TODO Tasks
  // present in the database
  Future<List<TODOModel>> getAllTODOS({List<String>? columns}) async {
    // the code below is used to get the access to the db getter
    final db = await dbClient.db;
    // the code below is used to query the database
    var result = await db.query("todoTable",columns: columns);
    // the code below is used to create a list to check if the result is not empty
    // then getting the data from the database else returning empty list
    List<TODOModel> todos = result.isNotEmpty ? result.map((item) => TODOModel.fromJSON(item)).toList() : [];
    return todos;
  }

  // the code below is used to create a method to update the todoTable
  Future<int> updateTODO(TODOModel todo) async {
    // the code below is used to get access to the db getter
    final db = await dbClient.db;
    // the code below is used to update the todo table
    var result = await db.update("todoTable", todo.toJSON(),where: "id = ?", whereArgs: [todo.id]);
    return result;
  }

  //the method below is used to Delete Todo records
  Future<int> deleteTodo(int id) async {
    final db = await dbClient.db;
    var result = await db.delete("todoTable", where: 'id = ?', whereArgs: [id]);

    return result;
  }
}
So in the above code, the createTODO method is used to create a new TODO task and add it to the database, getAllTODOS method is used to get all the todo tasks present in our database, the updateTODO method is used to update the todo task in the database, and the deleteTodo method is used to delete a todo at a specific id.
Now let us create a repository that will help us to abstract the data source provider from where the data is coming i.e. from our local database. So let us now create a repository.dart file inside the resources directory to create a Repository class to help us in the abstraction process.
// the code below is used to create a class that will act as an abstraction layer
// for the data source provider which is our local database
import 'package:todo_list/database/database_controller.dart';
import 'package:todo_list/model/todo_model.dart';

class Repository{
  // the code below is used to create an instance of the DatabaseController class
  final DatabaseController dbController = DatabaseController();

  Future getAllTodos() => dbController.getAllTODOS();

  Future insertTodo(TODOModel todo) => dbController.createTODO(todo);

  Future updateTodo(TODOModel todo) => dbController.updateTODO(todo);

  Future deleteTodo(int index) => dbController.deleteTodo(index);
}
Now since we have created a repository for acting as an abstract layer for doing operations with our data no matter from where our data is coming so now let us create our TODOBloc a reactive class that will be responsible for managing our todo data in the form of a series of multiple asynchronous events(transition of one data state to another data state) called streams. So let us now create a TODOBloc class inside the todo_bloc.dart file inside the blocs directory.
// the code below is used to create a class to write the business logic for our todo project
import 'package:rxdart/rxdart.dart';
import 'package:todo_list/model/todo_model.dart';
import 'package:todo_list/resources/repository.dart';

class TODOBloc{
  // the code below is used to create an instance of the repository class
  final Repository repository = Repository();

  // the code below is used to create an instance of the publish subject class
  final PublishSubject<List<TODOModel>> _todoFetcher = PublishSubject<List<TODOModel>>();

  // the code below is used to create a getter for getting of type Stream<TODOModel> for
  // getting the stream from PublishSubject()
  Stream<List<TODOModel>> get allTODOS => _todoFetcher.stream;

  // the code below is used to create an instance of the TODOBloc
  TODOBloc(){
    // the code below is used to call the getAllTODOs method
    getAllTODOs();
  }

  // the code below is used to create a method to get all the todos
  getAllTODOs() async {
    List<TODOModel> todo = await repository.getAllTodos();
    _todoFetcher.sink.add(todo);
  }

  // the code below is used to create a method to add the TODOs
  addTodo(TODOModel todo) async {
    await repository.insertTodo(todo);
    getAllTODOs();
  }

  // the code below is used to update the todos
  updateTodo(TODOModel todo) async {
    repository.updateTodo(todo);
    getAllTODOs();
  }

  // the code below is used to delete the TODO
  deleteTodo(int id) async {
    repository.deleteTodo(id);
    getAllTODOs();
  }

}

final todoBloc = TODOBloc();
So in the above code, we have created a TODOBloc class that will be used to process and store the business logic for the working of our app and the TODOBloc class uses the sinks to accept the input and the streams to provide the output to the user in the same file we also need to create an object for the TODOBloc class for accessing the methods inside the TODOBloc Class.
Now since we have written all the functionality for our app now it is time to create the UI of the app, so inside the ui directory let us create a file name todo_screen.dart, and this file will contain the UI for the app i.e. the Screen that will be shown to the user.
import 'package:flutter/material.dart';
import 'package:todo_list/blocs/todo_bloc.dart';
import 'package:todo_list/model/todo_model.dart';
import 'package:todo_list/ui/add_task_screen.dart';

// the code below is used to create the todo screen of the app
class TODOScreen extends StatelessWidget {
  const TODOScreen({Key? key}) : super(key: key);

  @override
  Widget build(BuildContext context) {
    // the code below is used to call the getAllTODOs method to get all the TODOs
    // from the database
    todoBloc.getAllTODOs();
    return Scaffold(
      appBar: AppBar(
        title: const Text('TODO List'),
      ),
      body: StreamBuilder<List<TODOModel>>(
        stream: todoBloc.allTODOS,
        builder: (context, AsyncSnapshot<List<TODOModel>> snapshot) {
          if (snapshot.hasData) {
            return ListView.builder(
              itemCount: snapshot.data!.length,
              itemBuilder: (context, index) {
                return ListTile(
                  title: Text(
                    snapshot.data![index].title.toString(),
                    style: TextStyle(
                      decoration: snapshot.data![index].done!
                          ? TextDecoration.lineThrough
                          : TextDecoration.none,
                    ),
                  ),
                  subtitle: const Text(
                    "Tap on the task to delete the task",
                  ),
                  onTap: () {
                    // the method below is used to delete the task from the database
                    todoBloc.deleteTodo(snapshot.data![index].id!.toInt());
                  },
                );
              },
            );
          } else if (snapshot.hasError) {
            // the code below is used to print the error on the screen
            return Text(snapshot.error.toString());
          } else if (snapshot.data == null) {
            return const Center(
              child: Text(
                "Enter your first task",
              ),
            );
          }
          return const Center(child: CircularProgressIndicator());
        },
      ),
      floatingActionButton: FloatingActionButton(
        onPressed: () {
          showModalBottomSheet(
              context: context,
              builder: (context) {
                return const AddTask();
              });
        },
        child: const Icon(
          Icons.add,
        ),
      ),
    );
  }
}
The code above is to create a basic UI for the TODO List where we have an app bar showing the name of the app and inside the Scaffold widget we are using the StreamBuilder of type List to get the List of TODOs as a Stream and display them on the screen and we are using the deleteTODO method from the TODOBloc class to delete the Task from our database. We have also used a Floating action button to save a TODO Task into our Database using the AddTask widget that we have created as shown below.
import 'package:flutter/material.dart';
import 'package:todo_list/blocs/todo_bloc.dart';
import 'package:todo_list/model/todo_model.dart';

class AddTask extends StatefulWidget {
  const AddTask({
    Key? key,
  }) : super(key: key);

  @override
  _AddTaskState createState() => _AddTaskState();
}

class _AddTaskState extends State<AddTask> {
  // getting the task name
  String? taskName;

  @override
  Widget build(BuildContext context) {
    return Column(
      children: <Widget>[
        const SizedBox(
          height: 10.0,
        ),
        TextField(
          decoration: const InputDecoration(
            hintText: "Enter Task",
          ),
          onChanged: (value) {
            setState(() {
              taskName = value;
            });
          },
        ),
        const SizedBox(
          height: 25.0,
        ),
        MaterialButton(
            child: Container(
              width: 200.0,
              height: 50.0,
              color: Colors.deepPurpleAccent,
              child: const Center(
                child: Text(
                  "Add",
                ),
              ),
            ),
            onPressed: () {
              todoBloc.addTodo(TODOModel(
                title: taskName,
                done: false,
              ));

              Navigator.pop(context);
            }),
      ],
    );
  }
}
So the above code is used to add the task to the database by using the addTODO method from the TODOBloc class.
So this is how we can use the Bloc pattern and the SQLite database for creating a TODO list for getting creating our tasks to always remain on track. I hope this will help you to understand the Bloc Pattern and the SQLite Database implementation in Flutter.